


Hey there! As a supplier of PED Shell and Tube Heat Exchangers, I've seen firsthand how important it is to keep these things clean. A well - maintained heat exchanger not only works better but also lasts longer. So, in this blog, I'm gonna walk you through how to clean a PED Shell and Tube Heat Exchanger.
Why Cleaning is a Big Deal
Before we jump into the cleaning process, let's talk about why you even need to clean your heat exchanger. Over time, dirt, minerals, and other gunk can build up inside the tubes and on the shell. This buildup acts like an insulator, making it harder for heat to transfer between the two fluids in the exchanger. As a result, your heat exchanger has to work much harder, which can lead to higher energy costs and more wear and tear on the equipment. In some cases, if the buildup gets really bad, it can even cause the heat exchanger to fail. So, regular cleaning is crucial to keep your system running smoothly.
Pre - Cleaning Checks
Before you start cleaning, you need to do a few checks. First, make sure the heat exchanger is completely shut down and isolated from the rest of the system. You don't want any hot or pressurized fluids flowing through it while you're working on it. Next, visually inspect the heat exchanger for any signs of damage, like cracks or leaks. If you find any, it's best to address those issues before you start cleaning. You should also gather all the tools and cleaning supplies you'll need, such as brushes, cleaning agents, and safety equipment like gloves and goggles.
Cleaning the Tubes
The tubes are where a lot of the heat transfer happens, so they need to be cleaned thoroughly. Here's how you can do it:

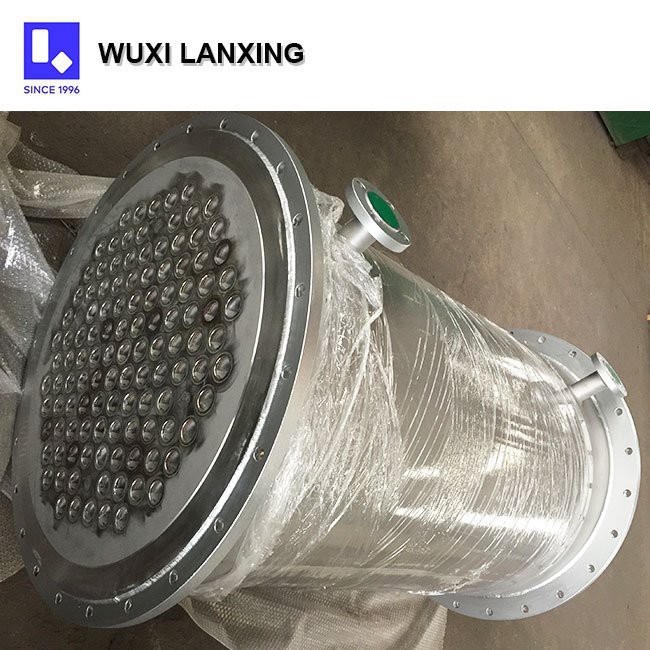
Mechanical Cleaning
One of the most common ways to clean the tubes is mechanically. You can use tube brushes that are specifically designed for the size of your tubes. Start by inserting the brush into the tube and move it back and forth. This will help dislodge any dirt or debris that's stuck inside. You may need to use different sizes and types of brushes depending on the level of buildup. For really stubborn deposits, you can use a power - driven tube cleaner. Just be careful not to damage the tubes while you're using these tools.
Chemical Cleaning
In some cases, mechanical cleaning may not be enough, especially if there are hard - to - remove mineral deposits. That's when chemical cleaning comes in handy. You'll need to choose a cleaning agent that's suitable for the type of deposits in your tubes. For example, if you have calcium carbonate deposits, an acid - based cleaner might work well. However, you need to be very careful when using chemicals. Make sure to follow the manufacturer's instructions and wear proper safety gear.
To perform chemical cleaning, you'll need to fill the tubes with the cleaning solution and let it sit for a certain period of time. This allows the chemicals to break down the deposits. After the soaking time is up, you can flush the tubes with water to remove the cleaning solution and the dissolved deposits. You may need to repeat this process a few times to get the tubes completely clean.
Cleaning the Shell
The shell of the heat exchanger also needs to be cleaned. Here's what you can do:
External Cleaning
Start by cleaning the outside of the shell. You can use a mild detergent and a soft cloth or sponge to wipe away any dirt or grime. This not only makes the heat exchanger look better but also helps prevent corrosion. Make sure to dry the shell thoroughly after cleaning to avoid rusting.
Internal Cleaning
To clean the inside of the shell, you can use a high - pressure water jet. This can help remove any debris or deposits that have accumulated on the inner surface of the shell. Just like with the tubes, be careful not to damage the shell while using the water jet. If there are any hard - to - reach areas, you may need to use a long - handled brush or a specialized cleaning tool.
Post - Cleaning Checks
Once you've finished cleaning both the tubes and the shell, it's important to do some post - cleaning checks. First, visually inspect the heat exchanger again to make sure all the deposits have been removed. You can also perform a pressure test to check for any leaks. If everything looks good, you can reassemble the heat exchanger and get it ready to be put back into service.
Tips for Maintaining a Clean Heat Exchanger
Cleaning your heat exchanger regularly is great, but there are also some things you can do to prevent excessive buildup in the first place. For example, make sure the fluids flowing through the heat exchanger are clean. You can use filters in your system to remove any solid particles before they enter the heat exchanger. Also, monitor the operating conditions of the heat exchanger, such as temperature and pressure. If you notice any abnormal changes, it could be a sign of a problem that needs to be addressed.
Related Heat Exchangers
If you're interested in other types of heat exchangers, we also offer Air Compressor Heat Exchanger and Titanium Shell and Tube Heat Exchanger. These are great options for specific applications. For those looking for a heat exchanger for an air compressor, our Heat Exchanger for Air Compressor is a top - notch choice.
Wrapping Up
Cleaning a PED Shell and Tube Heat Exchanger may seem like a daunting task, but if you follow the steps outlined in this blog, you should be able to do it effectively. Remember, regular cleaning and maintenance are key to keeping your heat exchanger in good working condition. If you have any questions or need more information about our PED Shell and Tube Heat Exchangers or the cleaning process, feel free to reach out. We're here to help you make the most of your heat exchanger and ensure it serves you well for years to come. Whether you're looking to purchase a new heat exchanger or need advice on maintenance, don't hesitate to contact us for a purchase and negotiation.
References
- "Heat Exchanger Design Handbook", by A. Shah and D. Sekulic
- "Industrial Heat Exchangers: Theory, Design, and Application", by K. Kakac and H. Liu


